Warning: Trying to access array offset on value of type bool in /home/appa4z94rg/public_html/wp-content/themes/Divi/includes/builder/functions.php on line 2592 Appalachian Baskets | painting retaining walls, cabinet painting Edmonton, patio installation Scottsdale
Painting retaining walls can be a rewarding project that revitalizes your outdoor space. However, it’s essential to approach this task with care to achieve lasting, attractive results. There are common pitfalls that can compromise the quality and durability of your paint job.
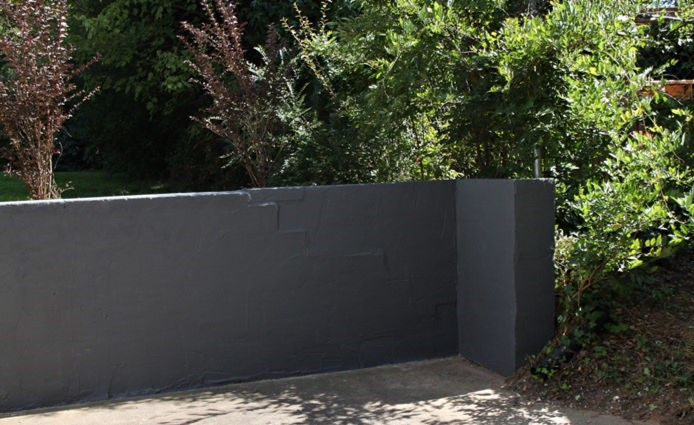
Top 8 Things to Avoid When Painting Retaining Walls
In this article, we discuss the top eight things to avoid when painting retaining walls for your property and even for your future reference.
1. Ignoring Wall Condition:
The first step in any painting project should be a thorough inspection of the wall. Painting over cracks, mold, or structural damage can lead to bigger issues down the line. Ensure the wall is in good condition, repairing any damage before proceeding with painting.
2. Skipping Surface Preparation:
Preparation is key to a successful paint job. Avoid painting on dirty or unstable surfaces. Clean the wall thoroughly and remove any loose paint or debris. A well-prepared surface ensures better paint adhesion and longevity.
3. Using the Wrong Paint:
Not all paints are suitable for retaining walls, especially those exposed to outdoor conditions. Avoid using interior paints or those not formulated for the specific material of your wall. Opt for high-quality exterior paints designed for masonry or concrete surfaces.
4. Ignoring Weather Conditions:
Painting in unsuitable weather can ruin your hard work. Avoid painting in extreme temperatures, high humidity, or when rain is forecasted. These conditions can affect paint drying and adherence.
5. Inadequate Priming:
Priming is crucial, particularly for porous surfaces like concrete. Skipping the primer can lead to uneven paint coverage and reduced durability. Use a high-quality primer suited for outdoor masonry surfaces.
6. Rushing the Process:
Applying paint too hastily or not allowing adequate drying time between coats can lead to subpar results. Avoid rushing to work. Take your time to apply each coat evenly and allow sufficient drying time.
7. Neglecting Safety Measures:
Retaining walls can be in tricky spots. Avoid neglecting safety precautions. Use appropriate ladders or scaffolding and wear protective gear, especially when working at height or with potentially harmful substances.
8. Overlooking Future Maintenance:
Finally, painting a retaining wall is not a set-and-forget task. Regular maintenance is crucial. Avoid the mindset that painting is a one-time job. Plan for periodic cleaning and touch-ups to maintain the wall’s appearance and integrity.
Conclusion: Top 8 Things to Avoid When Painting Retaining Walls
Painting a retaining wall can significantly enhance the aesthetic appeal of your property, but it’s a task that requires attention to detail and proper planning. Avoiding these eight common mistakes can make the difference between a paint job that is durable and attractive and one that fails prematurely. By considering the condition of the wall, using the right materials, respecting the painting process, and planning for future maintenance, you can ensure that your painted retaining wall remains a beautiful and lasting part of your landscape. Remember, a little extra effort and precaution in the beginning can save a lot of time and resources in the long run.
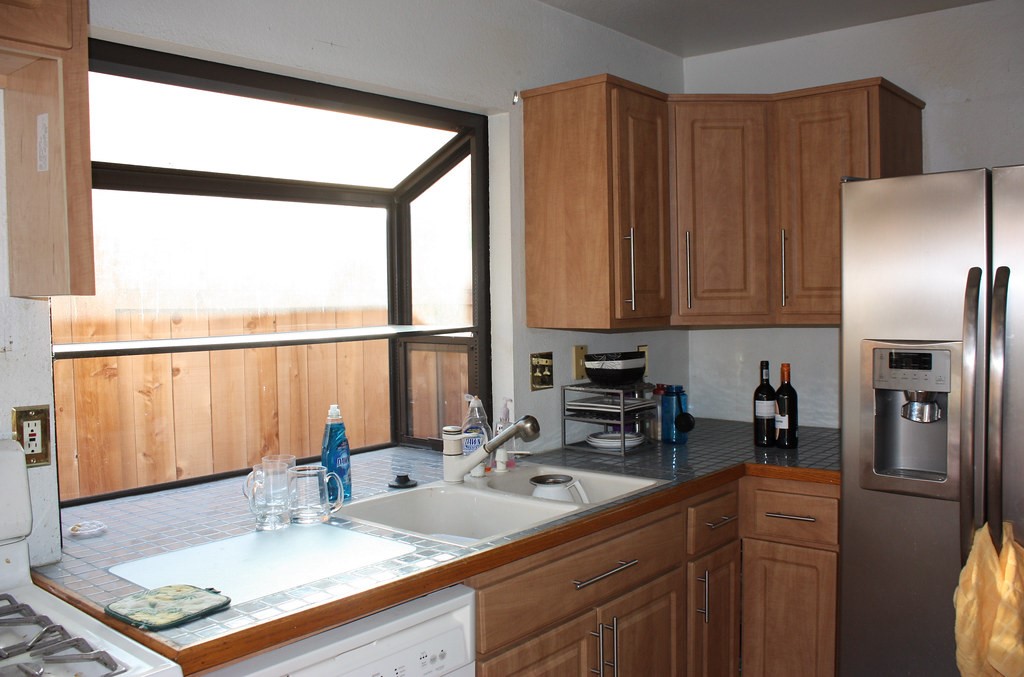
Painting cabinets can be a cost-effective way to give your kitchen or bathroom a new look and revitalize the space. However, weighing the benefits and drawbacks before deciding whether to tackle this task on your own is essential.
Most homeowners probably prefer hiring a professional to do the job. However, if you’re a homeowner who likes DIY projects, you’re probably considering DIY cabinet painting.
DIY cabinet painting is an excellent option for those looking to update their kitchen or bathroom on a budget. One of the significant advantages of taking on this project yourself is the potential for significant cost savings.
Hiring professional painters or replacing cabinets entirely can be expensive, but with DIY cabinet painting, you can achieve a fresh and updated look at a fraction of the cost.
With careful planning and execution, you can achieve professional-looking results without breaking the bank.
Con: Time-Consuming
While it may seem straightforward at first glance, painting cabinets involves several steps that require careful attention and patience. Preparing the surfaces, such as cleaning, sanding, and priming, is essential to ensure proper adhesion and a smooth finish.
The actual painting process itself can be time-intensive. Multiple coats may be required, with drying times between each layer. Removing cabinet doors and hardware, taping off areas, and protecting surrounding surfaces add to the overall time investment.
Depending on the size of your cabinets and the project’s complexity, the process may take several days or weeks to complete.
Pro: Pick Your Color Scheme
When you take on the project yourself, you can explore various colors and finishes to find the perfect match for your vision.
Whether you prefer classic white cabinets, bold and vibrant hues, or trendy neutrals, the choice is yours. DIY cabinet painting allows you to experiment with different color combinations and create a customized look that complements your overall decor scheme.
You can also consider lighting, wall colors, and existing furniture to ensure a harmonious and cohesive design. Having control over the color selection empowers you to transform your cabinets into focal points or seamlessly blend them with the surrounding elements in your space.
Con: You’ll Need the Right Tools
While it may be tempting to cut corners and use whatever brushes or rollers are readily available, investing in the right tools is crucial for a smooth and professional-looking finish. High-quality brushes and rollers designed specifically for cabinet painting ensure even application and minimize streaks or brush marks.
Sandpaper, sanding blocks, or electric sanders are essential for properly preparing the surfaces. Additionally, you may need a screwdriver or drill to remove cabinet doors and hardware for easier painting.
Other tools such as drop cloths or plastic sheeting, painter’s tape, and cleaning supplies are also essential for proper surface protection and preparation.
Conclusion
Tackling a DIY cabinet painting project has pros and cons that must be carefully considered. By weighing the pros and cons, you can make an informed choice that leads to a successful and satisfying cabinet painting experience.
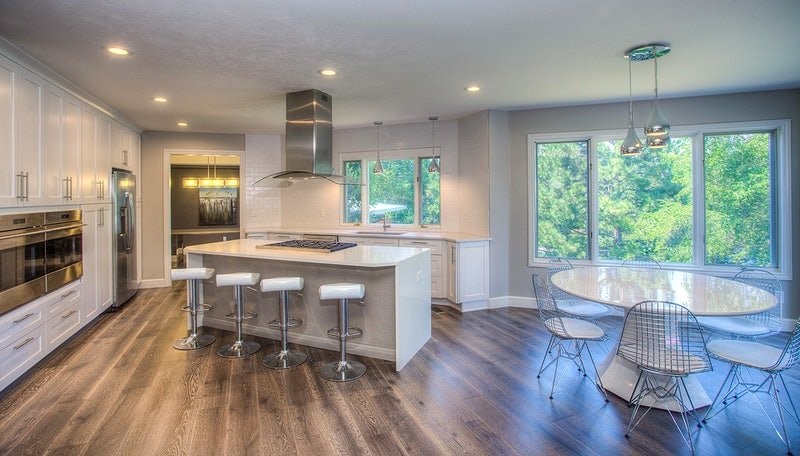
Open-concept living has become increasingly popular in recent years, and for a good reason. Breaking down walls and creating a seamless flow between spaces can revolutionize how you live, entertain, and interact with your home.
Whether renovating a small apartment or transforming an entire floor plan, embracing an open concept can bring fresh air to your home. It opens up new possibilities for design, functionality, and socializing.
So, should you consider an open concept for your next home renovations St Albert project? Here are some reasons why you should:
Create More Natural Lighting
One of the significant benefits of an open-concept design is its ability to create and maximize natural lighting throughout your living spaces.
By removing walls and barriers, light can flow freely from one area to another. Without walls obstructing the path of light, it can travel deeper into the interior, reaching even the farthest corners of your space.
This creates a brighter and more inviting atmosphere and reduces the need for artificial lighting during the daytime. The increased exposure to natural light not only positively impacts the overall aesthetics of your home but also offers numerous health benefits.
More Space for Entertainment
You can seamlessly integrate your living, dining, and kitchen spaces by removing walls and barriers. This open layout encourages a sense of togetherness, eliminating the separation between rooms and allowing for effortless socializing and communication.
Whether hosting a small gathering or a larger party, an open-concept design provides ample space for guests to move freely, mingle, and engage in conversations without feeling confined to one specific area.
Maximize Square Footage
Embracing an open-concept design can be a game-changer when maximizing your home’s square footage. The absence of walls opens up the visual flow and allows you to utilize every inch of available space efficiently.
It eliminates the feeling of being confined or segmented in separate rooms. Furthermore, an open concept design provides flexibility in furniture arrangement, enabling you to optimize the use of space and adapt it to your specific needs.
You can create a couple of multifunctional areas that seamlessly transition from one activity to another, such as a combined living and dining space or a flexible home office that can double as a guest room. This efficient use of square footage enhances your home’s functionality and maximizes its potential value.
Bigger Kitchen Area
An open-concept design can provide a bigger kitchen area within your home. It allows for a larger and more functional kitchen, where you can enjoy ample counter space, increased storage options, and enhanced flexibility in design.
You have the opportunity to incorporate a spacious island or peninsula, providing additional workspace for meal preparation, entertaining, and casual dining.
Furthermore, the increased visibility and accessibility of the kitchen create a more inclusive and inviting atmosphere, encouraging participation and collaboration in cooking and entertaining activities.
An open-concept design offers the potential to create a truly impressive and well-utilized kitchen space that becomes the heart of your home, where both functionality and aesthetics seamlessly blend together.